

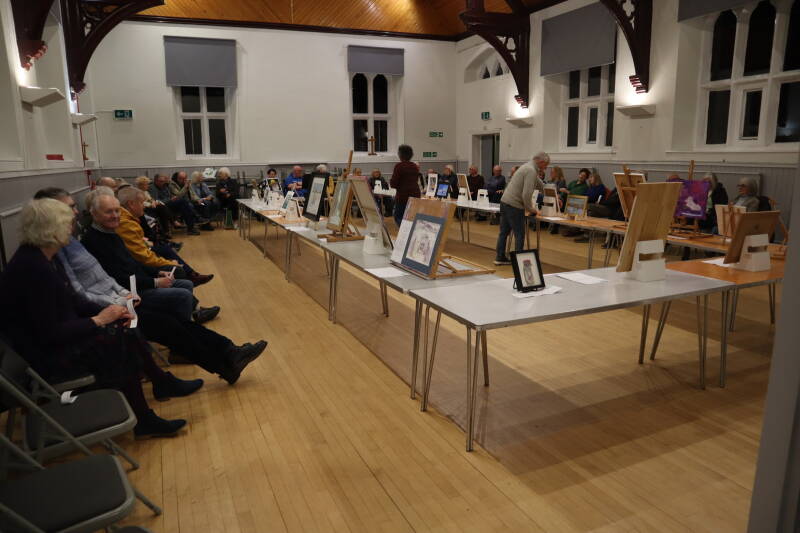
Winter Painting Challenge
Every year we set ourselves a winter painting challenge to help us through those cold winter months. This year we were set the task of creating a piece of work inspired by photographs which were kindly provided for us by Bury Photographic Society.
View the results of our labours below
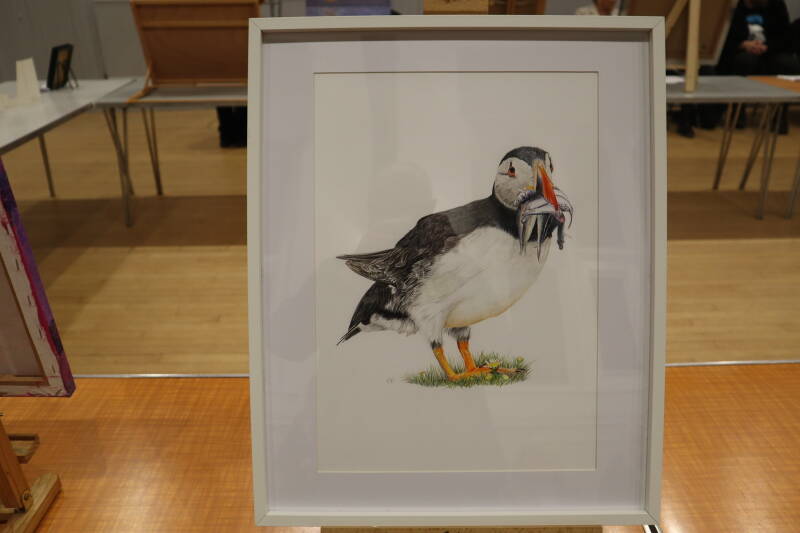
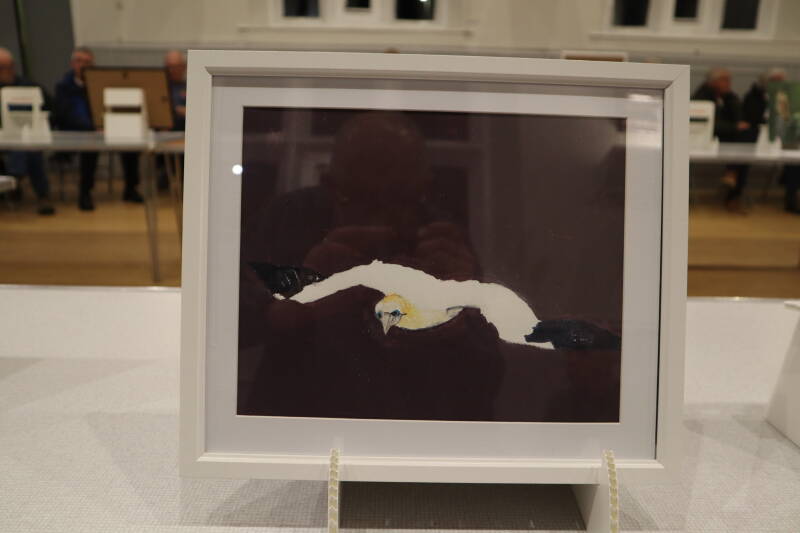
Catherine Shield was voted first prize with her puffin in coloured pencils followed by Bruce Myers with his bas relief in second and in third was Teresa Parnham's portrait in oils. you can read their explanations of their very excellent work below.
I’m absolutely thrilled to have won first place with this piece. It really means a lot to me and made the whole project even more special.
Over the past year, I’ve mainly been working with pastels, but I decided to challenge myself by returning to coloured pencils. For this illustration I used Faber-Castell Polychromos pencils and, to push myself further, I worked on a much larger scale than usual. (43cm x 53 cm framed.)
I began by carefully drawing the outline of the puffin, making sure the proportions were accurate. I knew that if the structure wasn’t right at the start, the whole piece wouldn’t work. Once I was happy with the drawing, I started shading, beginning with the head—particularly the eyes and beak—to capture the character of the bird.
Before moving on to the body, I focused on the sand eels in the puffin’s beak. These proved surprisingly challenging and I redrew them several times before I was satisfied with their shape and structure. Once they were correct, I shaded them carefully to recreate the subtle iridescent quality of their scales.
I then moved on to the puffin’s black feathers, layering blues and purples beneath the black to create depth. The white underbelly was built up using warm and cool greys, with touches of yellow and olive green to keep it looking natural. Finally, I worked on the feet to complete the bird.
The reference photograph was kindly supplied by Bury Photographic Society featured a blurred background. I decided to keep the focus entirely on the puffin, so instead of adding a colour background, I kept the background white but grounded the bird with a small clump of grass and a few sea daisies.
It was a thoroughly enjoyable piece to work on and a very rewarding project from start to finish.

Many thanks, I was very pleased with my work being so well received.
The style is called bas relief. I used DAS modelling clay (air drying) which, after trying several types of modelling clay / paste, I found to be the most versatile and easiest to work with and is quite cheap (£4 for a slab on Amazon)
Firstly I did a light skim of Polyfilla over the canvas board to help adhesion, then I sketched out the picture using a Posca marker and built up the relief using clay sculpting tools and the old reliable finger. The DAS clay gives you about twenty four hours to sculpt before it dries, so can be manipulated during this period.
Once I was happy with the sculpting, and once dried, I spray painted it black then did a heavy dry brush using bronze metallic acrylic paint. I then did a light dry brush with olive green acrylic paint to make it look aged.
Why this picture? To be honest I was struggling with the image until I found some bas relief tutorials on Youtube. I'd never used this style before so decided to give it a go. I wanted the piece to look like a Greco / Roman bronze casting as the image of the sprinter took my mind to that type of imagery / style.
It took about three weeks of a couple of hours each evening to complete. It's a very satisfying and enjoyable process. :-)
If anyone wants to try it then here are few tips that I discovered during the process:
- Dampen your surface before applying the clay, it helps it adhere.
- Dampen the clay before applying it to your surface.
- 'Block out' your image with the clay using your sketch as a guideline. Having the reference image to hand really helps.
- Use a hair dryer / heat gun to dry out the excess moisture before starting to sculpt.
- Work in small areas at a time, building the sculpt bit by bit.
- DO NOT try to make your own modelling paste (as per Youtube tutorials) as it costs a lot more and the results can be inconsistent.

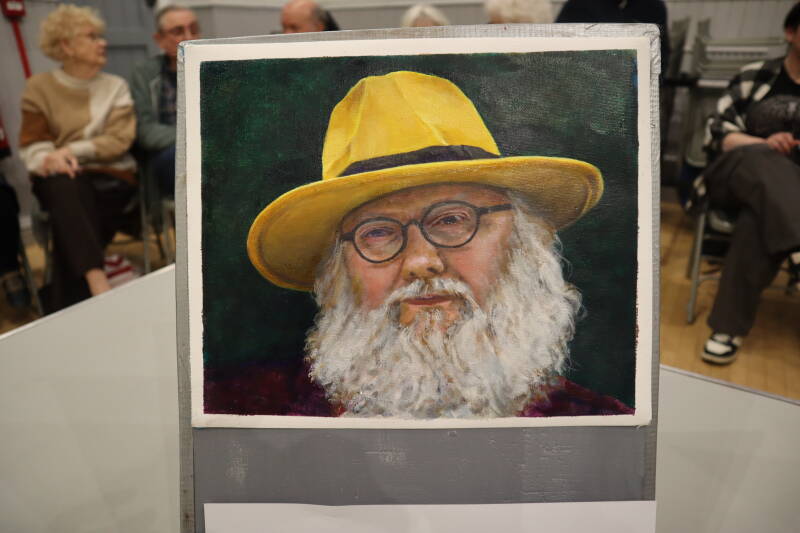
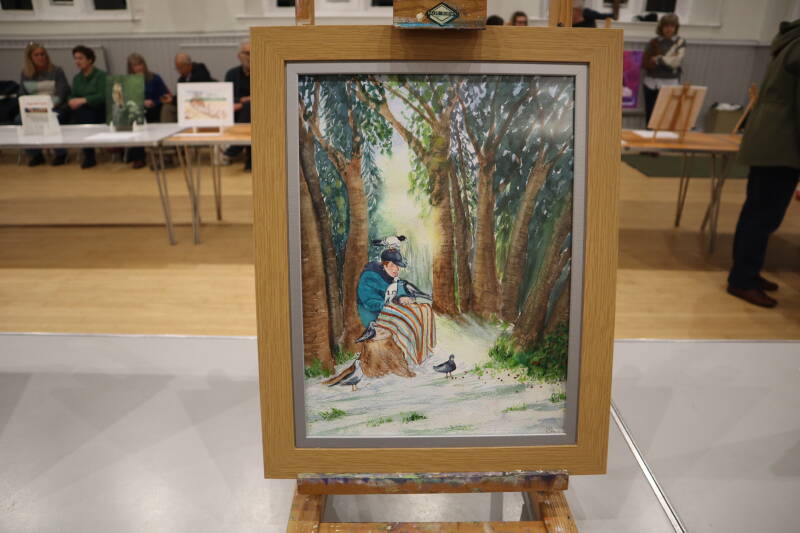
I did paint the portrait of the man in the yellow hat. I enjoy painting landscapes and portraits of animals and humans. Over the last few years I’ve been concentrating on painting portraits, I find them such a challenge.
Usually I use soft pastels for my animal studies, oils over acrylic for landscapes and oils for portraits. When using oils I may add a tiny bit of medium (linseed + turps) if the paints get too dry. I normally keep my glass palette in the freezer or fridge to keep the paint fresh.
With any portrait getting the drawing right and establishing the main shadows using a thin burnt umber is the first big challenge. In this case the hat and beard held the main shadows. The next challenge was the skin tone which in this case was pink. The shadows of the face were very, very subtle and difficult to make out. Generally I added cool colours (mixing in purple/green making a grey) to push features back and warm colours to bring them forward. Next I tackled the beard painting from dark to light, the specs came last. My approach is to blocked in the whole painting with the appropriate colours then refine each feature. My aim was to capture a realistic likeness so I tried to keep my tonal values about the same.
Teresa Parnham


